PostgreSQL
Setting up a local PostgreSQL database
Overview
This page explains how to install and configure a PostgreSQL database server and the psql command line client. This guide will cover how to install and set up these components on your computer for local access.
This guide will cover the following platforms:
Navigate to the sections that match the platforms you will be working with.
Once you have a PostgreSQL database, you can use Prisma Client to manage it from within your JavaScript or TypeScript applications. Try our PostgreSQL getting started guide to get started.
Setting up PostgreSQL on Windows
The PostgreSQL project provides a native Windows installer to install and configure your database.
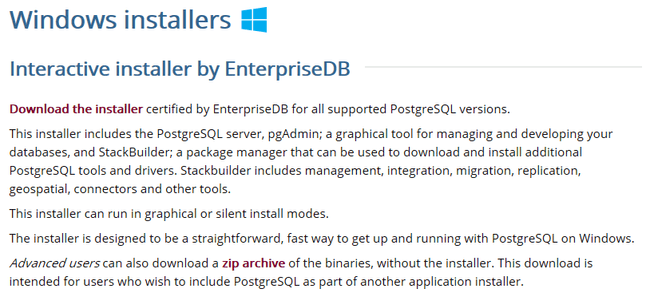
Visit the PostgreSQL Windows installation page to find a link to the installer. Click Download the installer at the start of the page:
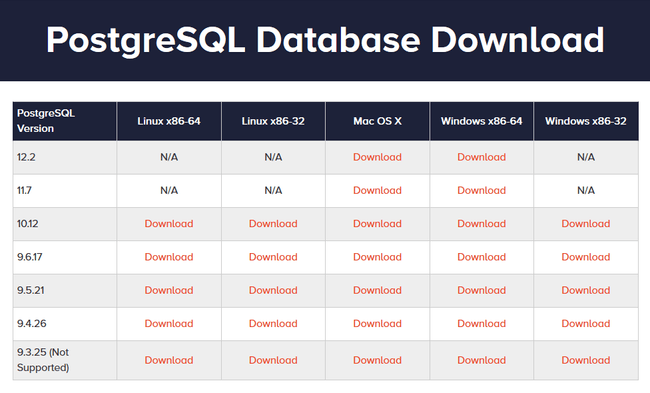
On the page that follows, in the Windows x86-64 or Windows x86-32 columns (depending on your computer's architecture), choose the PostgreSQL version you'd like to install:
Click Download on your chosen version and save the file to a convenient location.
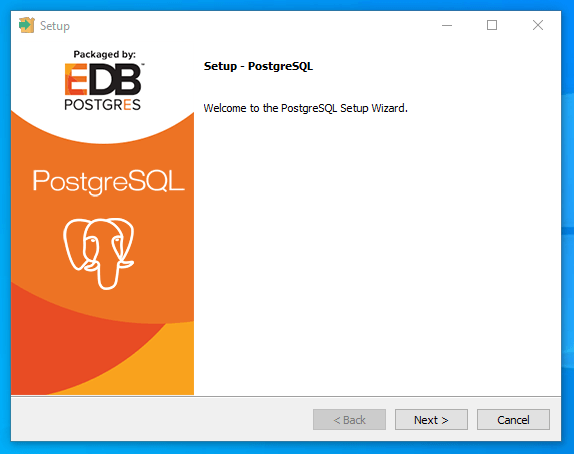
Once the download completes, double click on the file to run the installer (you may have to confirm that you wish to allow the program to make changes to your computer):
Click Next on the initial page to begin configuring your installation.
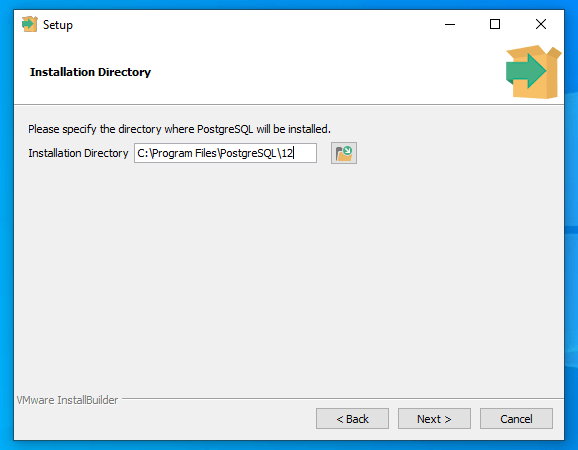
On the next page, choose your installation directory:
Click Next to accept the default location.
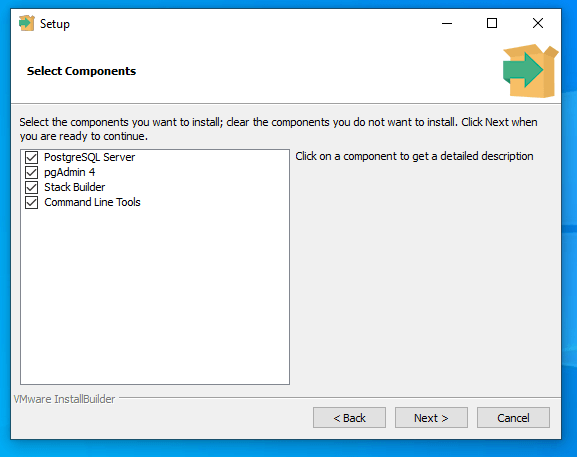
The next page allows you to choose which components you wish to install. You need the PostgreSQL Server and Command Line Tools selected at a minimum:
Click Next to continue.
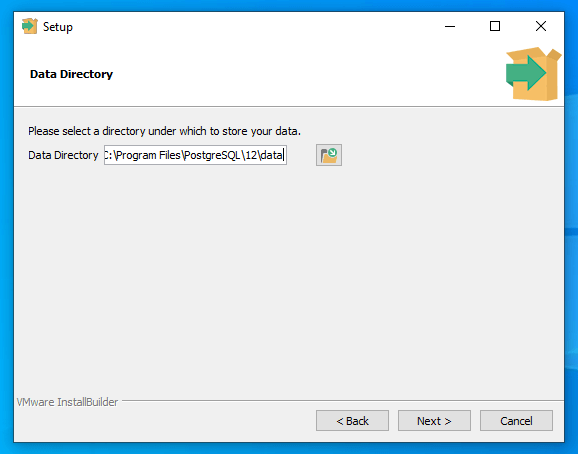
Now, choose the location where the database data files will be stored:
Click Next to accept the default location.
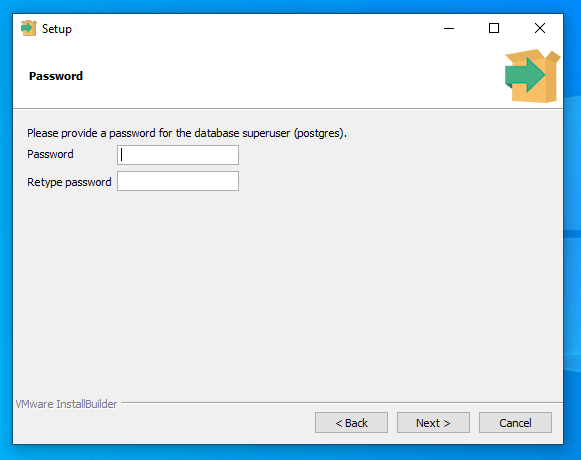
Next, select and confirm an administrative password for the PostgreSQL superuser (called postgres):
Click Next when you are finished.
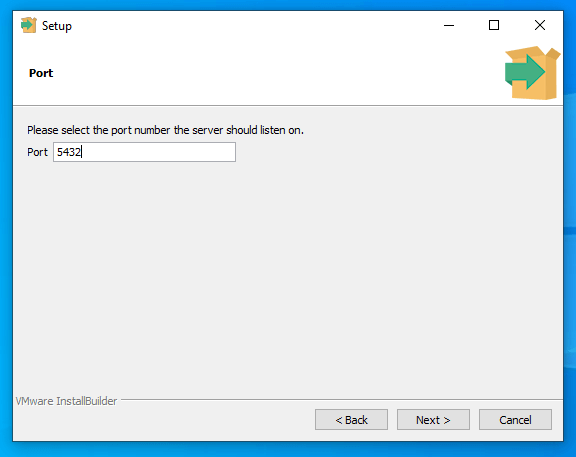
Choose the port that the server will listen to:
Click Next to accept the default 5432 port.
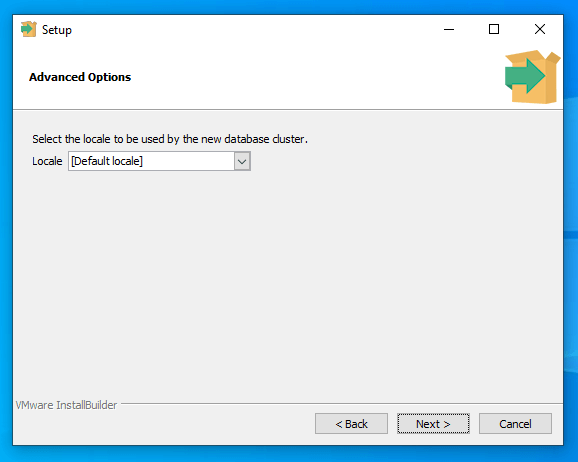
Now, pick the locale that your database will use:
Click Next to use the default locale of your computer.
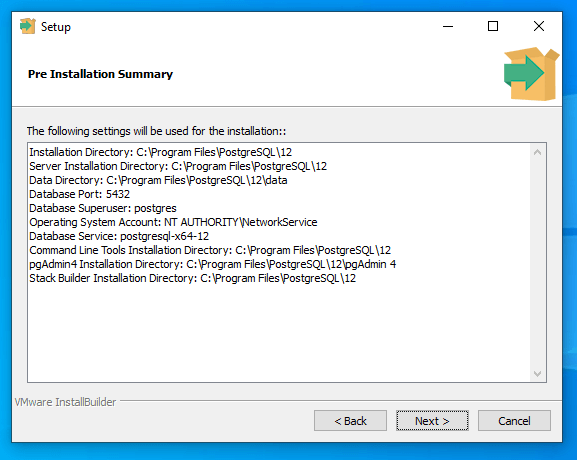
The configuration portion of the installation is now complete. You can review a summary of the choices you've made:
If everything looks correct, click Next.
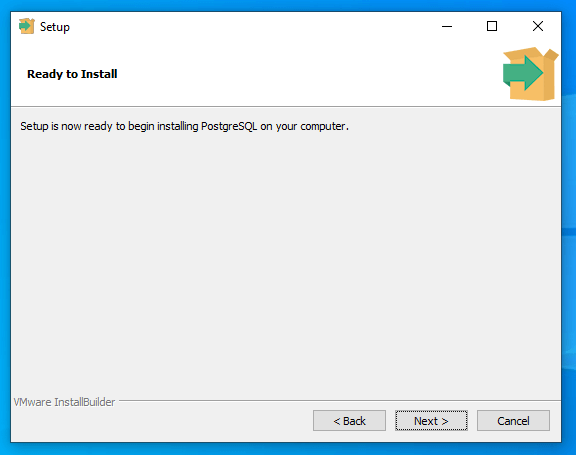
Finally, PostgreSQL is ready to be installed:
Click Next to begin the installation process.
Once the installation is complete, you can verify the installation using the psql command line tool.
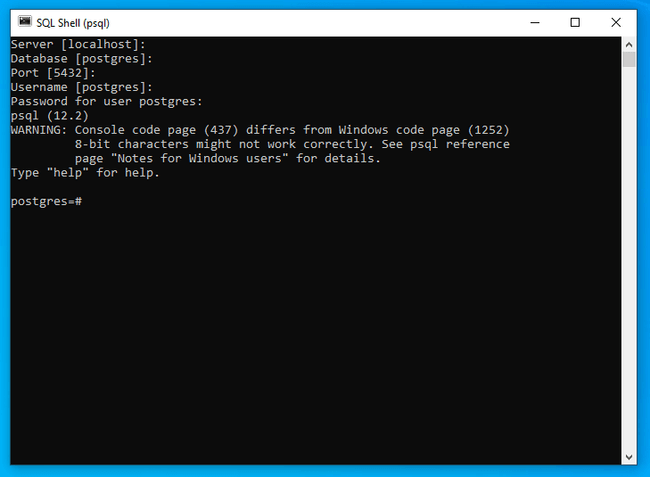
In your start menu, type psql and click on the tool to launch the program. You will be prompted to enter the connection details that you wish to use.
Press Enter to accept the default choices given in the square brackets. The final prompt will be for the password for the postgres user that you configured during setup.
Upon successfully authenticating, you will be dropped into an interactive psql session with your database.
When you are finished, exit the session by typing:
Setting up PostgreSQL on macOS
The PostgreSQL project provides a native macOS installer to install and configure your database.
Visit the PostgreSQL macOS installation page to find a link to the installer. Click Download the installer at the start of the Interactive Installer by EnterpriseDB section:
On the page that follows, in the Mac OS X column, choose the PostgreSQL version you'd like to install:
Click Download on your chosen version and save the file to a convenient location.
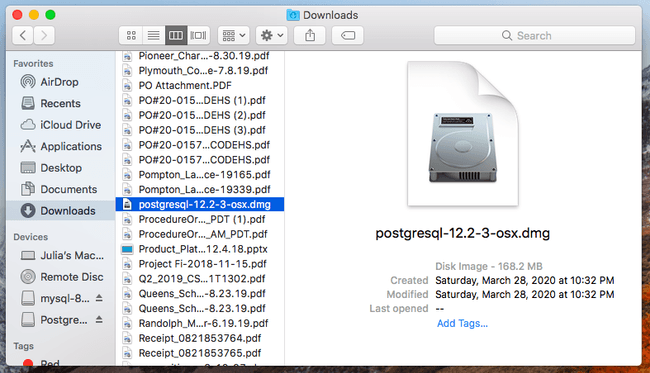
Once the download completes, find the PostgreSQL installer DMG in the Downloads folder. Double click on the downloaded DMG file to mount the installer archive:
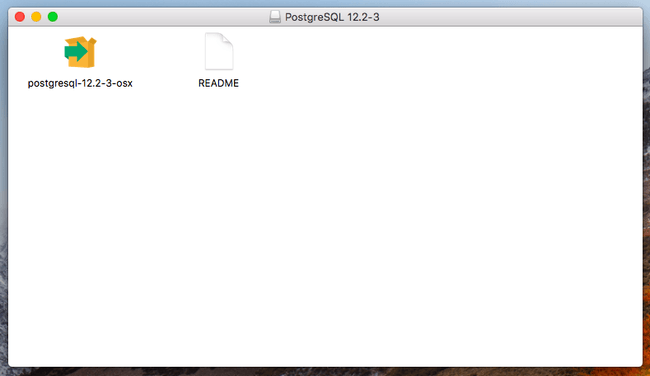
In the mounted archive, click on the PostgreSQL installer package (you may be prompted to confirm that you want the package to be able to make changes to your computer):
The PostgreSQL installer will open to the welcome screen:
Click Next on the initial page to begin configuring your installation.
On the next page, choose your installation directory:
Click Next to accept the default location.
The next page allows you to choose which components you wish to install. You need the PostgreSQL Server and Command Line Tools selected at a minimum:
Click Next to continue.
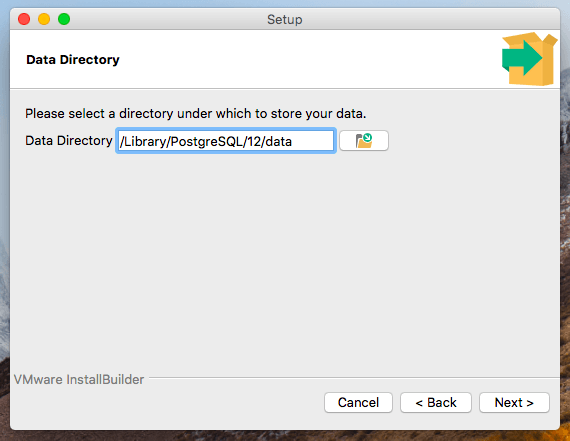
Now, choose the location where the database data files will be stored:
Click Next to accept the default location.
On the next page, select and confirm an administrative password for the PostgreSQL superuser (called postgres):
Click Next when you are finished.
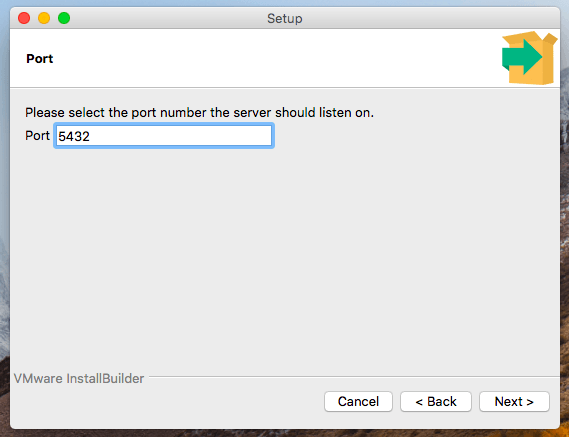
The following page lets you choose the port that the server will listen to:
Click Next to accept the default 5432 port.
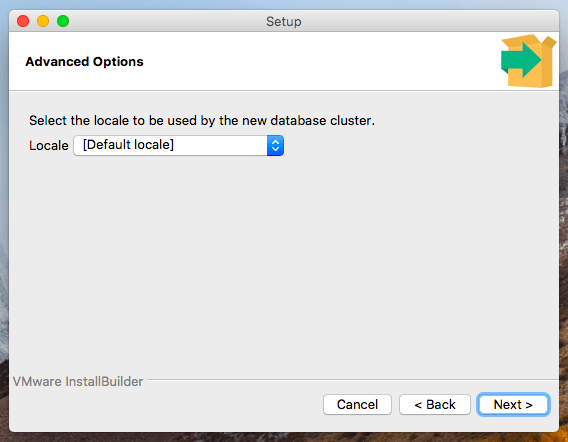
Now, pick the locale that your database will use:
Click Next to use the default locale of your computer.
The configuration portion of the installation is now complete. You can review a summary of the choices you've made:
If everything looks correct, click Next.
PostgreSQL is ready to be installed:
Click Next to begin the installation process.
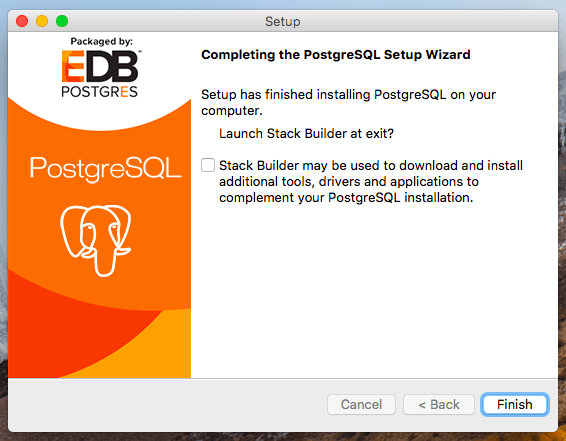
The installer will confirm completion when the process completes:
Now that PostgreSQL is installed, you can verify the installation using the psql command line tool. While this client is installed, we need to modify our terminal's PATH variable to access it easily.
Open a new terminal window to begin. First, find the PostgreSQL bin directory by typing:
The response will be the directory of your PostgreSQL bin directory. For example:
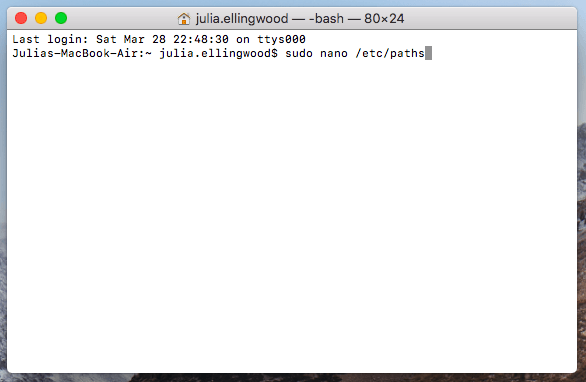
Now that you know the directory to use, edit the /etc/paths file by typing:
You will be prompted for your computer's administrative password to continue:
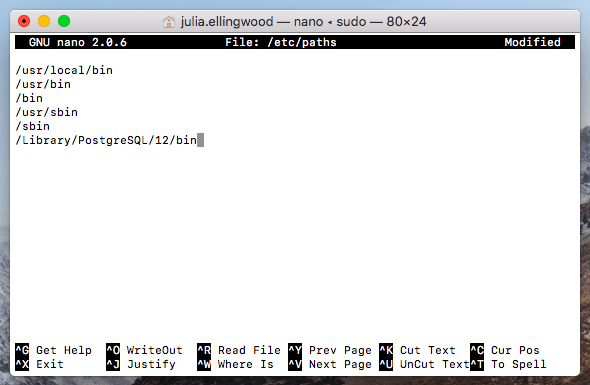
Add the path to bin directory that you found to the bottom of the file:
When you are finished, save and close the file by typing CTL-X, Y, and hitting ENTER.
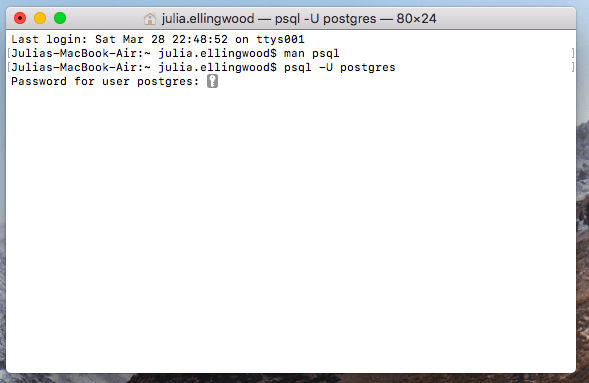
To use the new PATH settings, open a new terminal window. In the new window, type:
You will be prompted for the postgres user's administrative password that you set during the PostgreSQL configuration process:
Upon successfully authenticating, you will be dropped into an interactive psql session with your database.
To exit the session when you are finished, type:
Setting up PostgreSQL on Linux
Installation methods differ depending on the Linux distribution you are using. Follow the section below that matches your Linux distribution.
Debian and Ubuntu
You can either choose to use the version of PostgreSQL available in your distribution's default repositories or use repositories provided by the PostgreSQL project. Packages in the default repository are tested to work with all other software provided for your distribution, but may be older. Packages from the PostgreSQL project will be more up-to-date but may require extra configuration.
- Install using Debian or Ubuntu's default repositories
- Install using the PostgreSQL project's Debian and Ubuntu repositories
Install using Debian or Ubuntu's default repositories
Both Ubuntu and Debian provide versions of PostgreSQL server as packages within their default repositories. The PostgreSQL version may be older than those found on the PostgreSQL website, but this is the simplest way to install on these distributions.
To install PostgreSQL server, update your computer's local package cache with the latest set of packages. Afterwards, install the postgresql package:
By default, PostgreSQL is configured to use peer authentication, which allows users to log in if their operating system user name matches a PostgreSQL internal name.
The installation process created an operating system user called postgres to match the postgres database administrative account. To log into PostgreSQL with the psql client, use sudo to run the command as the postgres user:
When you are finished, you can exit the psql session by typing:
Install using the PostgreSQL project's Debian and Ubuntu repositories
If you need a more up-to-date version of PostgreSQL, you can use the repositories maintained by the PostgreSQL project instead of those provided by your Linux distribution.
First, add a new repository definition to your system by typing:
Next, add the PostgreSQL package signing key to apt so that it trusts the packages in the new repository:
With the repository set up, you can update your local package index and then install PostgreSQL by typing:
By default, PostgreSQL is configured to use peer authentication, which allows users to log in if their operating system user name matches a PostgreSQL internal name.
The installation process created an operating system user called postgres to match the postgres database administrative account. To log into PostgreSQL with the psql client, use sudo to run the command as the postgres user:
When you are finished, you can exit the psql session by typing:
CentOS and Fedora
You can either choose to use the version of PostgreSQL available in your distribution's default repositories or use repositories provided by the PostgreSQL project. Packages in the default repository are tested to work with all other software provided for your distribution, but may be older. Packages from the PostgreSQL project will be more up-to-date but may require extra configuration.
- Install using CentOS or Fedora's default repositories
- Install using the PostgreSQL project's CentOS and Fedora repositories
Install using CentOS or Fedora's default repositories
Both CentOS and Fedora provide versions of PostgreSQL server as packages within their default repositories. The PostgreSQL version may be older than those found on the PostgreSQL website, but this is the simplest way to install on these distributions.
To install PostgreSQL server, use your distribution's package manager to install the mysql-server package:
For CentOS use the yum package manager:
For Fedora use the dnf package manager:
Once the MySQL package is installed, initialize the database by typing:
Afterwards, start up the service by typing:
Optionally, you can automatically start PostgreSQL on boot by typing:
By default, PostgreSQL is configured to use peer authentication, which allows users to log in if their operating system user name matches a PostgreSQL internal name.
The installation process created an operating system user called postgres to match the postgres database administrative account. To log into PostgreSQL with the psql client, use sudo to run the command as the postgres user:
When you are finished, you can exit the psql session by typing:
Install using the PostgreSQL project's CentOS and Fedora repositories
If you need a more up-to-date version of PostgreSQL, you can use the repositories maintained by the PostgreSQL project instead of those provided by your Linux distribution.
To configure the PostgreSQL project's repository, download and install the repository setup package with in your terminal.
For CentOS execute the following command:
For Fedora use this command:
If you are using CentOS 8, you must also disable the system's PostgreSQL module to prevent it from interfering with the repository's PostgreSQL version. To do so, type:
Next, choose the version of PostgreSQL that you wish to target.
For CentOS, check which versions of PostgreSQL are available by typing:
For Fedora use the dnf package manager:
After deciding which version to use, you can install it using your package manager.
For CentOS use the yum package manager. For example, to install PostgreSQL 12, type:
For Fedora use the dnf package manager. For example, to install PostgreSQL 12, type:
Once the PostgreSQL package is installed, initialize the database:
Find the name of the systemd unit file for your version of PostgreSQL:
Start up the service using the unit file you found. For example, for PostgreSQL 12, it would be:
Optionally, you can also automatically start PostgreSQL on boot with the enable:
By default, PostgreSQL is configured to use peer authentication, which allows users to log in if their operating system user name matches a PostgreSQL internal name.
The installation process created an operating system user called postgres to match the postgres database administrative account. To log into PostgreSQL with the psql client, use sudo to run the command as the postgres user:
When you are finished, you can exit the psql session by typing:
